Dumb Cane Care: How to Care for Dieffenbachia, the Stunning Dumb Cane Plant
Published on
May 19, 2025
Author
Zuri Khumalo
Zuri's frequent journeys to South Africa in her youth ignited her fervor for environmental science, gardening, and sustainable living. These travels deepened her connection with nature, inspiring her to contribute to conservation efforts in her own meaningful ways.
Backyard Garden Ideas Q&A
What is the easiest backyard garden for beginners?
Container gardening and raised bed vegetable gardens are the easiest for beginners. Containers allow you to control the soil and move plants to find the best light, while raised beds prevent weeds and soil compaction, making maintenance much simpler.
How do I start a backyard garden with no experience?
Start small. Choose a small outdoor space or a few pots on a patio. Pick 3 to 5 easy-to-grow plants (like basil, cherry tomatoes, or marigolds), buy high-quality potting soil, and place them in an area that gets good sunlight. Observe them daily to learn their watering needs.
What vegetables grow best in a backyard garden?
For most backyard spaces, tomatoes, zucchini, radishes, lettuce, and bush beans are excellent, high-yield choices. If you have a very small backyard, opt for vertical growers like climbing peas or pole beans.
How much does it cost to start a backyard garden?
You can start a simple backyard container garden for under $50 by purchasing a few pots, soil, and seeds. Building raised beds or implementing full backyard landscaping ideas on a budget might cost between $150 to $500, depending on the materials used (like reclaimed wood vs. cedar).
Do backyard gardens need full sun?
Not necessarily! While vegetable gardens and drought-tolerant Mediterranean setups require full sun (6+ hours), you can easily create a beautiful shade garden using ferns, hostas, and astilbes in low-light outdoor areas.
How often should I water backyard plants?
This depends heavily on your garden type and climate. Container gardens and raised beds may need daily watering during peak summer heat. In-ground drought-tolerant shrubs might only need watering once every few weeks. A general rule is to water deeply when the top 1-2 inches of soil feel dry.
Can I grow a garden in a small backyard?
Absolutely. Small backyard ideas like vertical gardens, hanging baskets, and compact container gardening allow you to transform even the tiniest balcony or narrow side yard into a lush outdoor oasis.
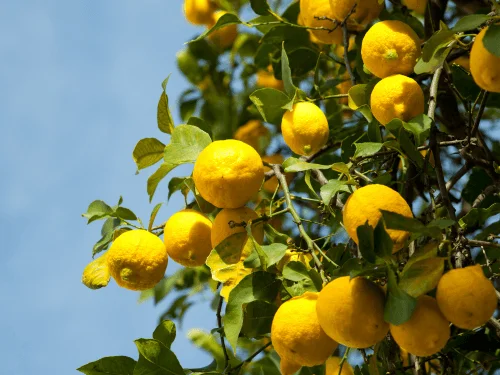
How to Grow a Lemon Tree FAQ
Do I need two lemon trees to produce fruit?
No, you do not. Lemons are self-pollinating, which means the flowers contain both the male and female parts necessary to produce fruit. A single little lemon tree can yield an abundant harvest all on its own.
How do I pollinate my indoor lemon tree?
While lemons are self-pollinating, they normally rely on wind and bees to move the pollen around the blossom. Because you are growing indoors, you must act as the bee. When the tree is in full bloom, take a small, soft paintbrush or a cotton swab and gently brush the inside of each flower, moving from blossom to blossom. This simple act will successfully pollinate the flowers, ensuring they turn into fruit.
Why is my Meyer lemon tree not blooming?
A Meyer lemon tree typically fails to bloom due to a lack of light or insufficient fertilizer. Ensure your tree is getting a full 8 to 12 hours of direct sunlight. Also, double-check your feeding schedule; a lack of phosphorus can inhibit blooming. Finally, ensure the tree isn't too cold, as cool temperatures can delay or prevent the bloom cycle entirely.
English Garden Q&A
How can I implement English garden ideas if I only have a very small space or a compact front garden?
Focus heavily on vertical layering using climbing roses or honeysuckle, and use a soft pastel color palette to add an illusion of depth. Gathering multi-sized planters along walkways also provides an overflowing, lush look within a restricted footprint.
What are the best strategies to ensure my English border retains visual interest during the winter months?
Incorporate structural evergreens like boxwood hedges, pruned topiary, or permanent hardscape anchors like a stone sundial. Avoid clear-cutting in autumn; leaving dried seed heads and tall foxglove stalks intact through winter captures striking structural shapes and textures.
Can I achieve an authentic cottage style look if my yard does not receive direct sun all day?
Yes. While roses need direct sun, classic woodland edge plants like the foxglove thrive beautifully in partial shade and dappled light. Pair these with shade-tolerant foliage and soft ground cover to capture a romantic, layered look.
Dieffenbachia, also known as dumb cane, is a stunning tropical plant that adds vibrant greenery to any indoor garden. With its large, variegated leaves, this plant is a popular choice for house plant enthusiasts. However, to ensure your Dieffenbachia thrives and maintains its beauty, it’s important to understand its specific care needs. Whether you're new to plant care or looking to expand your collection, learning how to care for a dumb cane can make all the difference.
Learn how to move your plants inside without stress and create a cozy, thriving environment for them to flourish year-round.
If you're wondering how to propagate Dieffenbachia, it’s not as tricky as it may seem—this plant is known for being relatively easy to propagate when the right conditions are met. In this guide, we'll cover everything from common problems, like yellowing leaves, to essential tips for growing and caring for your dumb cane. With the right care, your Dieffenbachia can flourish, bringing lush beauty and a touch of the tropics to your home. Keep reading to discover the best practices for Dieffenbachia care and how to make your plant thrive.
Plant Attribute
Details
Plant Name
Dumb Cane (Dieffenbachia spp.)
Plant Type
Tropical perennial (commonly grown as a houseplant)
Size
3–10 feet tall, 1–3 feet wide depending on variety
Soil Type
Well-draining, rich potting mix with peat, perlite, or coco coir
Soil pH
Slightly acidic to neutral (6.1–7.0)
Bloom Time
Rarely blooms indoors; flowers are insignificant
Hardiness Zones
USDA zones 10–12 (can be grown outdoors in tropical climates)
Native Area
Tropical Central and South America
Toxicity Level
Moderate to high – toxic to humans and pets if ingested (contains calcium oxalate crystals)
Best Dumb Cane Types
Here are some popular and visually distinct cultivars of Dieffenbachia:
1. Dieffenbachia 'Camille'
This elegant variety is known for its striking contrast between creamy white centers and rich dark green leaf margins. Its compact size and symmetrical rosette shape make it a favorite for indoor spaces, especially in well-lit corners or office settings. 'Camille' thrives in bright, indirect light and enjoys consistently moist (but not soggy) soil. It’s a low-maintenance cultivar perfect for beginners.
2. Dieffenbachia 'Tropic Snow'
One of the larger and more dramatic cultivars, 'Tropic Snow' features broad, glossy green leaves adorned with bold white marbling throughout the center. It can grow up to 5 feet tall indoors, making it an excellent statement plant for spacious living areas. This variety enjoys medium to bright indirect light and needs occasional pruning to maintain its shape and height.
3. Dieffenbachia 'Compacta'
True to its name, 'Compacta' is a dwarf variety ideal for desks, tabletops, or small apartments. Despite its smaller stature, it maintains the same striking foliage pattern found in larger types—typically deep green leaves with light green or cream variegation. It grows in a bushy form, stays under 2 feet tall, and adapts well to moderate light levels, making it perfect for indoor environments with limited space.
How to Plant Dumb Cane (Beginner-Friendly Steps)
Planting from Nursery Seedlings (Most Common)
Choose a healthy potted dieffenbachia with no signs of pests or yellow leaves.
Select a pot 1–2 inches wider than the root ball, with drainage holes.
Fill it with rich, well-draining potting mix (e.g., peat-based with perlite).
Gently remove the plant from its current pot and loosen roots.
Place in the new pot and backfill with soil, leaving 1 inch of space at the top.
Press soil gently and water lightly to settle.
Planting from Seed (Less Common and Slow)
Soak dieffenbachia seeds in warm water for 24 hours to soften.
Prepare a seed-starting tray with moist, sterile seed mix.
Press seeds lightly into soil; do not bury deeply.
Cover with a humidity dome or plastic wrap.
Place in a warm (75–85°F), bright, indirect light location.
Germination may take 1–3 months. Transplant seedlings when 3–4 inches tall.
Dumb Cane (Dieffenbachia) Growing Requirements:
Soil:
Dieffenbachia thrives in well-draining soil that is rich in organic matter, which helps retain moisture while still allowing excess water to escape. A mix formulated for tropical plants or houseplants is ideal, as it provides the right balance of aeration and nutrients. It’s important that the soil is light and airy; dense, heavy soils retain too much moisture, which can result in root rot. If you're unsure, you can add perlite or coarse sand to improve drainage and create a better environment for root development.
Discover how to grow and maintain these bold, tropical beauties for lush foliage and dramatic garden impact.
Water:
Water your Dieffenbachia regularly, but be cautious not to overwater. Keep the soil consistently moist, ensuring it doesn’t dry out completely. However, you should always avoid letting the plant sit in standing water, as this can cause the roots to rot. To maintain the right moisture level, allow the top inch of soil to dry out before watering again. During the growing season (spring and summer), water more frequently, while in fall and winter, you can reduce watering as the plant's growth slows down.
Temperature:
Dieffenbachia prefers consistently warm temperatures, ideally between 60°F and 75°F (15°C to 24°C), making it perfect for indoor environments. It cannot tolerate cold temperatures and should never be exposed to drafts or air conditioning, which can cause stress and stunt its growth. A sudden temperature drop below 50°F (10°C) can damage the plant, causing leaf discoloration or death. Keep it away from windows that might let in chilly air, especially during colder months.
Humidity:
As a tropical plant, Dieffenbachia thrives in high humidity. It prefers humidity levels of 60% or higher to stay healthy. If your home tends to be dry, especially in winter due to heating, you may need to supplement its humidity. Misting the leaves lightly every few days can help, but a more consistent way to boost humidity is to use a humidifier near the plant. Grouping plants together can also help create a microenvironment of higher moisture. If humidity drops too low, the plant’s leaves might turn brown at the edges.
Sunlight:
Dieffenbachia flourishes in bright, indirect light, which mimics the filtered light it would receive in its natural tropical habitat. Direct sunlight can scorch the leaves, causing brown or yellow patches, especially on the edges. While it can tolerate lower light conditions, growth will slow significantly, and the plant may become leggy or sparse. To ensure optimal growth, place it in a spot where it can receive a few hours of indirect sunlight each day, such as near a window with a sheer curtain or away from a direct sunbeam.
Location:
Dieffenbachia thrives in bright, indirect light, making it essential to place it in a spot that offers filtered light without direct exposure to the sun's rays. A north- or east-facing window is ideal, as these orientations provide gentle, diffused sunlight that helps the plant grow strong and healthy. If you have a south- or west-facing window, where sunlight can be more intense, it's best to position the Dieffenbachia a few feet away from the window to prevent sunburn or scorching of the leaves. Alternatively, you can use a sheer curtain or blinds to diffuse the light, creating a softer, indirect lighting effect that mimics the plant’s natural environment. This ensures that the Dieffenbachia receives the optimal amount of light for healthy growth without being exposed to harsh, direct sunlight.
Maintenance Tips for Dumb Cane
Fertilizer
Feed your Dumb Cane monthly during the growing season (spring and summer) with a diluted balanced liquid fertilizer, such as a 10-10-10 or 20-20-20 mix. This provides the essential nutrients for healthy growth. During the fall and winter months, when the plant is dormant or growing more slowly, stop fertilizing. Over-fertilizing during the winter can lead to weak growth. Be sure to dilute the fertilizer to avoid burning the roots.
Pruning
Regular pruning is essential for maintaining the health and appearance of your Dumb Cane. Start by removing any yellowing, dead, or damaged leaves using sterilized pruning shears. This will help the plant focus its energy on new, healthy growth. To encourage bushier growth, prune back tall stalks or any leggy branches. When pruning, always wear gloves, as the sap is toxic and can irritate your skin or eyes. Sterilizing your shears before and after each use helps prevent the spread of disease.
Mulching (for Outdoor Planting Only)
For outdoor plants, apply a 2- to 3-inch layer of bark mulch around the base of the plant. This will help conserve moisture in the soil, regulate temperature, and suppress weed growth. Ensure the mulch is kept a few inches away from the base of the plant to prevent rot or fungus growth, which can harm the roots. During particularly dry periods, mulch will help retain moisture for longer periods, keeping your plant hydrated.
Potting and Repotting
Dumb Cane should be repotted every 2 to 3 years or when it becomes root-bound (when the roots have outgrown the pot). When repotting, choose a slightly larger pot that allows for proper root expansion and provides better drainage. Be sure to use fresh, well-draining potting soil to prevent the buildup of salts and minerals. The best time to repot is in the spring, just as the plant begins to emerge from its winter dormancy, ensuring it has ample time to adjust to the new pot.
Overwintering (for Outdoor Plants in Warm Zones)
If you're growing your Dumb Cane outdoors in warmer zones, it's important to prepare it for the cooler months. Move container plants indoors when temperatures dip below 60°F to prevent frost damage. During this period, reduce watering as the plant enters a dormant phase. Stop fertilizing to allow the plant to rest and conserve energy for the next growing season. Make sure the indoor location has enough indirect light for the plant to maintain its health through the winter months.
Common Pests and Diseases
Pests
Spider Mites
Spider Mites are tiny pests that appear as red or yellow specks and produce fine webbing on the underside of leaves. These mites thrive in dry conditions and can be particularly harmful to plants by feeding on the sap. To manage spider mites, it’s helpful to regularly mist plants to reduce their presence. Treatment with neem oil or insecticidal soap can be effective in eliminating the pests, especially when applied to the undersides of leaves where they are commonly found. Repeating the treatment every 7-10 days may be necessary to fully eradicate the infestation.
Aphids
Aphids are small, pear-shaped insects that are often green or black and cluster around new growth, buds, and leaves. They can rapidly multiply and damage plants by sucking out sap. A quick solution to remove aphids is to spray the plant with a strong stream of water, dislodging them from the plant. For larger infestations, neem oil or insecticidal soap can be applied. Additionally, introducing natural predators like ladybugs can help manage aphid populations.
Mealybugs
Mealybugs are small, cotton-like pests that form clumps along the stems or leaf joints of plants. They feed on plant sap and secrete a sticky substance that can attract mold. The best way to manage mealybugs is by manually removing them with a cotton swab soaked in rubbing alcohol. For more widespread infestations, neem oil or insecticidal soap can be applied to the affected areas, and the treatment should be repeated if necessary to fully eliminate the pests.
Scale Insects
Scale Insects appear as hard, brown or black bumps attached to stems or leaves. These pests are challenging to remove, but gently scraping them off with a soft brush or cloth dipped in rubbing alcohol can help eliminate them. After manually removing the visible scale insects, treating the plant with horticultural oil can effectively kill any remaining pests and prevent further infestations. Regular treatments may be needed to fully eradicate the scale insects.
Diseases
Root Rot
Root Rot is often caused by overwatering or poor drainage, which deprives the plant's roots of oxygen. To treat root rot, remove the plant from its pot and inspect the roots. Any mushy or discolored roots should be trimmed away. Repot the plant in fresh, dry soil with good drainage to avoid future issues. Going forward, water the plant only when the soil is dry to the touch to prevent further overwatering.
Leaf Spot
Leaf Spot is a condition caused by either fungal or bacterial infections, leading to dark, water-soaked spots or lesions on the leaves. To manage leaf spot, remove any affected leaves to prevent the infection from spreading. Improving airflow around the plant and avoiding overhead watering can reduce the likelihood of future infections. If the disease is persistent, applying a fungicide for fungal leaf spots or a bactericide for bacterial leaf spots can help control the problem.
Anthracnose
Anthracnose is a fungal infection that causes dark, sunken lesions along the edges of leaves and may spread to the stems. The best approach to managing anthracnose is to prune and remove all infected areas of the plant. Afterward, apply copper fungicide to the healthy plant tissue, following the manufacturer's instructions for correct application. To prevent the fungus from recurring, avoid overhead watering, improve air circulation, and maintain good plant care practices.
Frequently Asked Questions:
Q: Why is it called "Dumb Cane"?
A: The name "Dumb Cane" comes from the toxic sap found in the plant's stems and leaves. If ingested, it can cause swelling in the mouth and throat, making it difficult to speak, hence the term "dumb."
Q: Can Dumb Cane grow outdoors?
A: Dumb Cane can be grown outdoors in USDA hardiness zones 10–12, where temperatures stay above 60°F (15°C) year-round. Plant it in a shaded or partially shaded area, and bring it inside if temperatures drop.
Q: How can I keep my Dumb Cane healthy during winter?
A: During the winter months, Dumb Cane may enter a period of dormancy. Reduce watering and stop fertilizing during this time. Keep the plant in a location that stays between 60–70°F (15–21°C) and ensure it still gets indirect light.
Q: Should I rotate my Dieffenbachia plant?
A: Yes, rotating the plant regularly ensures that all sides receive adequate light, which helps it grow evenly. Rotate your plant every few weeks to promote balanced growth.
Related posts
Here are some articles you might be interested in.


.webp)
%20Growing%20Requirements.webp)