Growing Rhododendrons from Seed: How to Successfully Grow Rhododendrons from Scratch
Published on
April 17, 2025
Author
Sarah Wilson
Sarah Wilson started her gardening journey during the pandemic and had fallen in love with it ever since. Eager to connect with fellow garden enthusiasts, she wants to share the knowledge she's gained over the past three years.
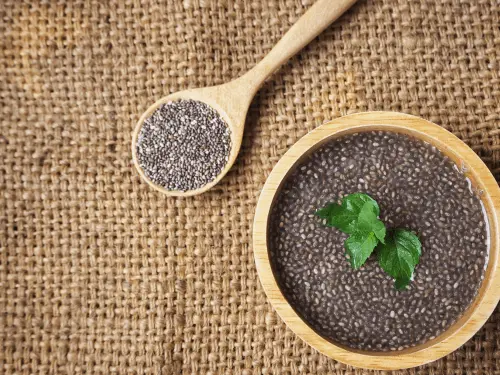
Growing Chia Plants Q&A
Can I grow chia from the chia seeds I buy at the store?
Yes. Organic chia seeds from the grocery store will often germinate, though germination can vary. Fresh seed from a garden supplier is more reliable.
How long does it take to grow chia?
Seeds sprout in about a week. The plant needs 100 to 150 days to mature before you can harvest the seeds.
Is chia a California native plant?
Salvia hispanica is native to central Mexico and Guatemala. However, Salvia columbariae, sometimes called California chia, is a California native plant.
Can I grow chia indoors?
You can grow chia sprouts and microgreens indoors easily. A full-size chia plant needs strong light and rarely sets a good seed crop indoors.
Why won't my chia flower?
Chia flowers when days get shorter. Plants in cooler regions or those lit at night may bloom late or not at all.
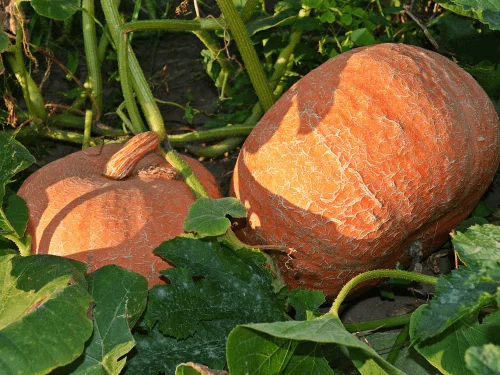
How to Grow Pumpkins Q&A
Can I grow pumpkins in a small home garden?
Yes. Choose bush or miniature varieties, grow vines on a trellis, or use raised beds. Plan on one or two plants per hill and prune vines when space is tight.
When should I plant pumpkins for Halloween?
Plant seeds in late May or early June in most climates. Count back from your first frost date and allow for 90 to 120 days of growth.
Why does my pumpkin plant have flowers but no fruit?
Male flowers appear first, so early flowers will not set fruit. If female flowers open but fail to fruit, you probably have too few bees. Pollinate by hand in the morning.
What causes pumpkin leaves to turn white?
This is usually powdery mildew. Improve airflow, water at the base, remove infected leaves, and apply a fungicide or neem oil.
Can I eat the pumpkin I grew for carving?
Yes, though carving types are stringy and bland. Pie pumpkins are sweeter, but the seeds from any pumpkin can be roasted.
Growing Grapevines Q&A
How long does it take for a grape plant to produce fruit?
Most young vines need two to three years after planting before they set a full crop, though a few clusters may appear in year two. Patience pays off — established vines can keep producing for 40 years or more.
Do I need more than one vine to grow grapes?
No. Since most grape varieties are self-fertile, one plant is enough to produce fruit on its own. Planting a second variety nearby is optional and mainly helps with cross-pollination in a few less common types.
Can grape vines grow in containers?
Yes, though grape vines grow best planted directly in the ground, where the root system has room to spread. A large container works for a year or two, but expect to transplant once the vine outgrows the pot.
Why aren't my grapes ripening?
Grapes ripen slowly compared to many fruits, and cool weather, too much shade, or overcrowded canes can all delay the process. Give the vine full sun, thin the clusters, and be patient through the growing season.
What's the difference between table grapes and wine grapes?
Table grapes are bred for fresh eating, with thinner skins and fewer seeds, while wine grapes tend to have thicker skins, more seeds, and higher sugar content suited to fermentation.
Are grape vines toxic to pets?
Grapes and grape leaves are not toxic to people, but grapes and raisins are toxic to dogs and can cause kidney damage, so keep fallen fruit cleaned up if pets have access to the vineyard.
This disclosure clearly states that the content creator may earn a commission if readers make a purchase through the provided links. Learn more
Rhododendrons are prized for their stunning, vibrant blooms and lush evergreen foliage, making them a favorite among gardeners and plant enthusiasts. While many people propagate them through cuttings or grafting, growing rhododendrons from seed offers a rewarding way to cultivate unique varieties and develop resilient plants from the ground up. However, patience and the right techniques are key, as rhododendrons have specific germination and growth requirements.
In this guide, we’ll walk you through everything you need to know about successfully growing rhododendrons from seed, from seed collection and preparation to germination, transplanting, and long-term care. Whether you're a seasoned gardener or a beginner looking for a challenge, this step-by-step approach will help you nurture these breathtaking plants from scratch.
Plant Attribute
Details
Plant Type
Shrub or small tree
Size
Varies by species; typically 3–20 feet tall (some tree-like species can reach up to 80 feet)
Soil Type
Well-draining, acidic soil rich in organic matter
Soil pH
4.5–6.0 (prefers acidic soil)
Bloom Time
Spring to early summer (some varieties bloom in fall or winter)
Hardiness Zones
Zones 4–9, depending on the species
Native Area
Asia, North America, and Europe (commonly found in temperate forests)
Toxicity Level
Toxic to humans and pets if ingested (contains grayanotoxins)
Best Types of Rhododendrons
There are over 1,000 species of rhododendrons, with a wide range of hybrids and cultivars. Some of the best types for home gardens include:
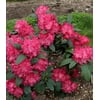
Large-leaved rhododendrons are known for their broad, glossy green foliage and striking, showy flowers that bloom in a wide range of colors, including pink, purple, red, and white. These plants thrive in cool, shaded environments with high humidity, making them ideal for woodland gardens or areas with dappled sunlight. Their lush foliage remains evergreen, providing year-round visual interest. To ensure healthy growth, they require well-drained, acidic soil and consistent moisture, as they are sensitive to drought.
More compact than their large-leaved counterparts, small-leaved rhododendrons are well-suited for rock gardens, alpine landscapes, and container planting. Their petite size and dense foliage make them excellent choices for small spaces or as accent plants in mixed borders. Despite their smaller stature, they produce vibrant flowers in shades of purple, pink, or blue. These varieties are often more cold-hardy and require well-draining, acidic soil to thrive.
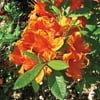
Unlike evergreen rhododendrons, deciduous varieties, commonly known as azaleas, shed their leaves in the fall and winter. Many of these species are prized for their fragrant flowers, which bloom in spring in bright hues of yellow, orange, pink, and red. Additionally, their foliage often turns brilliant shades of red, orange, or gold in autumn, adding seasonal interest to the landscape. These plants prefer acidic, well-drained soil and perform best in partial shade or filtered sunlight.
Hybrid rhododendrons are specially bred for desirable traits such as unique flower colors, enhanced cold tolerance, or a more compact growth habit. Popular varieties like ‘P.J.M.’ feature small, vibrant purple blooms and exceptional cold resistance, making them ideal for northern climates. Meanwhile, ‘Nova Zembla’ is known for its deep red flowers and ability to withstand harsher conditions. These hybrids are versatile garden plants that provide reliable color and structure, thriving in acidic, well-draining soil with moderate moisture and shade.
Step-by-Step Process for Planting Rhododendron Seeds
Growing rhododendrons from seed is different from planting mature seedlings. The process requires patience but allows gardeners to grow unique hybrids with different characteristics.
For healthy growth, the plant needs well-draining, acidic soil with a pH of 4.5–6.0, which ensures essential nutrients remain available. Without the right pH balance, the plant may struggle to absorb nutrients, leading to stunted growth. A well-structured soil mix of peat moss, perlite, and sand provides the perfect balance of moisture retention and aeration. Peat moss naturally increases acidity, perlite improves airflow, and sand prevents compaction, allowing roots to spread easily. To further regulate moisture, adding a thin layer of sphagnum moss on top can help retain humidity without making the soil too wet. Since excessive moisture can cause root rot and fungal infections, ensuring proper drainage is crucial for maintaining a healthy root system.
Water
Just as soil structure is important, proper watering keeps the plant’s roots healthy and functioning efficiently. The soil should stay consistently moist but never soggy, as too much water suffocates the roots, while dryness can lead to dehydration. To maintain the right balance, water thoroughly whenever the top layer of soil feels slightly dry. If growing the plant in a container, choosing one with drainage holes helps prevent excess water buildup. The type of water used also matters—tap water can alter soil acidity over time, so rainwater or distilled water is a better choice. Beyond regular watering, maintaining humidity levels is also essential. Misting the plant, using a humidity tray, or placing a humidifier nearby can help prevent moisture loss without oversaturating the soil.
Temperature and Humidity
Along with watering, stable temperature and humidity levels create the ideal environment for growth. The plant thrives best in temperatures between 60–70°F (15–21°C), where it can grow without stress. When temperatures drop below 50°F (10°C), growth slows, making the plant more vulnerable to diseases. On the other hand, excessive heat can cause wilting and dehydration, emphasizing the need for a controlled environment. High humidity is just as important, as dry air can cause the leaves to brown and curl at the edges. To maintain humidity, placing the plant on a humidity tray, using a humidifier, or misting regularly can be helpful. For seedlings, enclosing them in a plastic bag with small ventilation holes can create a moist microclimate, but it’s important to check for mold, as stagnant air can lead to fungal growth.
Sunlight and Location
While temperature and humidity provide the right growing conditions, proper light exposure determines the plant’s overall health. Partial shade is ideal, as too much direct sunlight can scorch delicate leaves and dry out seedlings. Indoors, placing the plant near a bright, indirect light source—such as a north- or east-facing window—ensures it receives enough light without damage. If the sunlight is too intense, sheer curtains or moving the plant slightly away from the window can help diffuse it. Outdoors, selecting the right location is equally important. The plant should be placed in a sheltered spot where it receives dappled or filtered sunlight, mimicking its natural habitat. While gentle morning sun is beneficial, prolonged afternoon sun exposure can cause dehydration and leaf damage. If necessary, moving the plant throughout the day can help maintain the perfect balance between light and shade.
Maintenance Tips for Healthy Growth
Fertilization
Ensuring proper nutrition is crucial for both young seedlings and mature plants. For seedlings, use a diluted, balanced liquid fertilizer every two weeks to provide a steady supply of nutrients without overwhelming their developing root systems. This helps establish strong stems and vibrant foliage early on. Once the plant reaches maturity, its nutrient demands shift. In early spring, before new growth emerges, apply a slow-release fertilizer designed for acid-loving plants, such as one formulated for azaleas or camellias. This ensures a consistent nutrient supply throughout the growing season, promoting lush foliage and, if applicable, vibrant blooms. Avoid over-fertilizing, as excessive nutrients can lead to leggy growth or mineral imbalances.
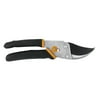
Regular pruning keeps the plant healthy and well-structured. In early spring, before new growth begins, inspect the plant for dead, damaged, or weak branches. Removing these not only redirects energy to healthier growth but also prevents potential pest infestations and diseases. Additionally, pruning for shape is essential—thinning out dense areas improves air circulation, reducing the risk of fungal issues and promoting even light distribution. When shaping the plant, aim for an open structure that allows sunlight to penetrate all areas evenly. Always use sharp, sterilized pruning shears to make clean cuts and minimize stress on the plant.
Applying mulch is an effective way to regulate soil conditions and protect plant roots. Spread a 2–3 inch layer of organic mulch, such as shredded bark, pine needles, or well-aged compost, around the base of the plant, keeping it a few inches away from the stem to prevent rot. Mulch serves multiple functions: it conserves moisture by reducing evaporation, suppresses weed growth that could compete for nutrients, and moderates soil temperature, keeping roots cool in summer and insulated during colder months. Over time, organic mulch decomposes, enriching the soil with beneficial nutrients and improving its overall structure. Refresh the mulch layer as needed, particularly before the onset of extreme seasonal temperatures.
When grown in containers, plants require periodic repotting to ensure continued health and vitality. Every 2–3 years, check for signs that repotting is needed, such as roots circling the pot, water draining too quickly, or slowed growth. Choose a slightly larger container with drainage holes and fill it with fresh peat-based soil, which provides the right balance of aeration and moisture retention. Gently loosen the roots before transplanting to encourage outward growth in the new soil. After repotting, water the plant thoroughly to help it settle and reduce transplant shock. Avoid repotting during active blooming periods, as this can cause unnecessary stress and affect flowering.
Cold temperatures pose a significant challenge, especially for plants that are sensitive to frost. In garden beds, applying a thick layer of mulch—such as straw, bark, or pine needles—around the base provides insulation, helping to protect roots from freezing conditions. For container-grown plants, exposure to harsh winter winds and fluctuating temperatures can be even more damaging. Before the first frost, move potted plants to a sheltered location, such as a greenhouse, unheated garage, or an indoor space with bright, indirect light. If bringing plants indoors, gradually acclimate them over a few days to minimize shock. Reduce watering during dormancy but ensure the soil remains slightly moist to prevent dehydration. If left outdoors, wrap containers in burlap or place them in a protected corner to shield them from extreme cold.
Aphids – These tiny sap-sucking insects cause sticky leaves and curled foliage. If left unchecked, they can weaken the plant. To manage them, spray the affected areas with insecticidal soap or a diluted neem oil solution.
Lace Bugs – These pests create yellowing leaves with tiny black spots, which can lead to leaf drop. Applying neem oil or introducing natural predators like ladybugs can help control their population.
Spider Mites – Signs of an infestation include fine webbing between leaves and discoloration, often appearing as a stippling effect. Since they thrive in dry conditions, increasing humidity and using miticides can help prevent and eliminate them.
Diseases
Powdery Mildew – This fungal disease appears as a white powdery coating on leaves, hindering photosynthesis and plant growth. To treat it, prune affected parts to improve airflow and apply a fungicide to stop its spread.
Root Rot – Caused by overwatering and poor drainage, root rot results in wilting plants and blackened, mushy roots. To prevent it, ensure the soil drains well and water only when necessary. If detected early, repotting the plant in fresh, well-draining soil may help save it.
Leaf Spot – This disease causes brown spots on leaves, which can spread and weaken the plant. Removing infected leaves and applying a fungicide can help manage the issue and prevent further damage.
If you want to propagate more plants, follow these steps to ensure a successful harvest and storage of rhododendron seeds:
Wait Until Seed Pods Dry and Split – Rhododendron seed pods typically mature by late summer to early fall. Allow them to remain on the plant until they turn brown and begin to split open naturally. This indicates that the seeds inside are fully developed and ready for collection.
Carefully Collect and Store the Seeds – Once the pods split, gently remove them from the plant and place them in a paper bag. Shake the bag lightly to release the tiny seeds from the pods. Store the seeds in a sealed container, such as an airtight glass jar or a zip-lock bag, in a cool, dry place to prevent moisture from causing mold or premature germination.
Sow Fresh Seeds Within a Year – For the best germination rates, plant the seeds within a year of harvesting. Rhododendron seeds have higher viability when fresh, so sow them in a well-draining, acidic seed-starting mix under bright, indirect light. Keep the soil consistently moist but not waterlogged to encourage healthy germination and growth.
Frequently Asked Questions:
Q: How long does it take for rhododendron seeds to germinate?
A: Rhododendron seeds usually take 4–8 weeks to germinate, but some species may take longer, especially in cooler temperatures.
Q: Can I grow rhododendrons indoors?
A: Yes, you can grow rhododendrons indoors, but they require high humidity, cool temperatures, and bright, indirect light. They are better suited for greenhouse conditions.
Q: How do I keep my rhododendron seedlings from drying out?
A: Keep seedlings in a humid environment by covering them with a plastic bag or placing them in a greenhouse. Mist the soil regularly but avoid overwatering.
Related posts
Here are some articles you might be interested in.