Lipstick Plant Care: How to Care for Lipstick Plant (Aeschynanthus Radicans) and Keep It Thriving
Published on
March 28, 2025
Author
Sarah Wilson
Sarah Wilson started her gardening journey during the pandemic and had fallen in love with it ever since. Eager to connect with fellow garden enthusiasts, she wants to share the knowledge she's gained over the past three years.
How to Grow Pumpkins Q&A
Can I grow pumpkins in a small home garden?
Yes. Choose bush or miniature varieties, grow vines on a trellis, or use raised beds. Plan on one or two plants per hill and prune vines when space is tight.
When should I plant pumpkins for Halloween?
Plant seeds in late May or early June in most climates. Count back from your first frost date and allow for 90 to 120 days of growth.
Why does my pumpkin plant have flowers but no fruit?
Male flowers appear first, so early flowers will not set fruit. If female flowers open but fail to fruit, you probably have too few bees. Pollinate by hand in the morning.
What causes pumpkin leaves to turn white?
This is usually powdery mildew. Improve airflow, water at the base, remove infected leaves, and apply a fungicide or neem oil.
Can I eat the pumpkin I grew for carving?
Yes, though carving types are stringy and bland. Pie pumpkins are sweeter, but the seeds from any pumpkin can be roasted.
Growing Grapevines Q&A
How long does it take for a grape plant to produce fruit?
Most young vines need two to three years after planting before they set a full crop, though a few clusters may appear in year two. Patience pays off — established vines can keep producing for 40 years or more.
Do I need more than one vine to grow grapes?
No. Since most grape varieties are self-fertile, one plant is enough to produce fruit on its own. Planting a second variety nearby is optional and mainly helps with cross-pollination in a few less common types.
Can grape vines grow in containers?
Yes, though grape vines grow best planted directly in the ground, where the root system has room to spread. A large container works for a year or two, but expect to transplant once the vine outgrows the pot.
Why aren't my grapes ripening?
Grapes ripen slowly compared to many fruits, and cool weather, too much shade, or overcrowded canes can all delay the process. Give the vine full sun, thin the clusters, and be patient through the growing season.
What's the difference between table grapes and wine grapes?
Table grapes are bred for fresh eating, with thinner skins and fewer seeds, while wine grapes tend to have thicker skins, more seeds, and higher sugar content suited to fermentation.
Are grape vines toxic to pets?
Grapes and grape leaves are not toxic to people, but grapes and raisins are toxic to dogs and can cause kidney damage, so keep fallen fruit cleaned up if pets have access to the vineyard.
Bee Garden Q&A
What flowers attract the most bees to a garden?
Bees are generally drawn to flowers that are blue, purple, yellow, or white, and that offer easy access to nectar and pollen. Lavender, bee balm, sunflower, and coneflower are some of the most reliable plants that attract bees to a home garden.
Do I need to avoid pesticides in a bee-friendly garden?
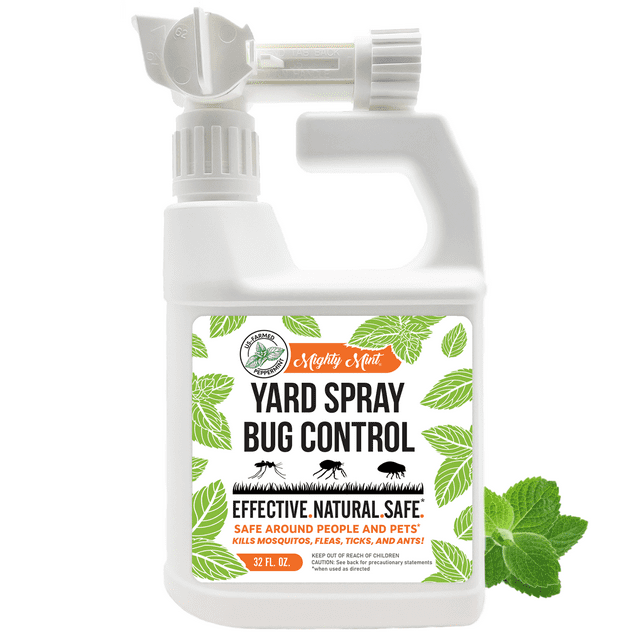
Yes, whenever possible. Insecticide and pesticide products can harm adult bees and their larva, even in small amounts. Choosing natural pest control methods helps keep your garden safe for visiting bees.
Can a small home garden still support pollinators?
Absolutely. Even a few containers of zinnias, salvia, or crocus on a balcony can offer pollen and nectar for local bees. Bees will travel between small garden spaces, so every bit of habitat helps.
Do bees need more than just flowers?
Yes. Bees also need nesting sites and water. Ground-nesting bees need patches of bare soil, while a shallow bee bath gives bees a safe spot to drink, especially in hot weather.
Will planting a pollinator garden really help save the bees?
It genuinely can. As natural habitat shrinks, home gardens have become an important food source and shelter for bees, including many native bee species. A well-planned bee garden supports pollination for your own flowers and vegetables while helping the wider bee population.
What is the best USDA zone for growing a bee garden?
There is no single best zone. Most of the plants above grow well across USDA zones 4 through 9, and gardeners in colder or warmer zones can simply choose varieties suited to their climate, or grow warm-season bees favorites like sunflower and zinnia as annuals.
With its cascading vines and vibrant red, tube-shaped flowers, the lipstick plant (Aeschynanthus radicans) is a stunning addition to any indoor garden. Named for its flower buds that resemble a tube of lipstick emerging from its case, this tropical beauty thrives in warm, humid conditions and is perfect for hanging baskets or elevated planters. While relatively low-maintenance, it requires the right balance of light, water, and humidity to flourish. In this guide, we’ll walk you through everything you need to know about lipstick plant care—from ideal growing conditions to troubleshooting common problems—so you can keep your plant thriving and blooming year-round.
Plant Attribute
Details
Plant Name
Lipstick Plant (Aeschynanthus radicans)
Plant Type
Epiphytic, Tropical Flowering Vine
Size
Up to 3 feet long when mature
Soil Type
Well-draining, lightweight potting mix
Soil pH
Slightly acidic to neutral (5.5-7.0)
Bloom Time
Spring and summer, with blooms lasting several weeks
Hardiness Zones
USDA Zones 10-11
Native Area
Southeast Asia
Toxicity Level
Non-toxic to pets and humans
Best Lipstick Plant Types
Lipstick plants (Aeschynanthus) are known for their vibrant, tube-shaped flowers and trailing growth habit, making them excellent choices for hanging baskets and indoor displays. Here are some of the best varieties, each with unique foliage and floral features:
The classic lipstick plant, featuring long, trailing stems adorned with glossy, deep green leaves. It produces clusters of bright red, tubular flowers that emerge from dark, lipstick-like buds, giving the plant its name. This variety thrives in warm, humid conditions and is a favorite for indoor hanging planters.
A more striking version of Aeschynanthus radicans, this variety boasts larger, more vibrant red flowers. The blooms have a rich, almost velvety texture, creating a dramatic contrast against the plant’s lush green foliage. ‘Mona Lisa’ is an excellent choice for those looking for a more pronounced floral display.
Aeschynanthus ‘Curly’
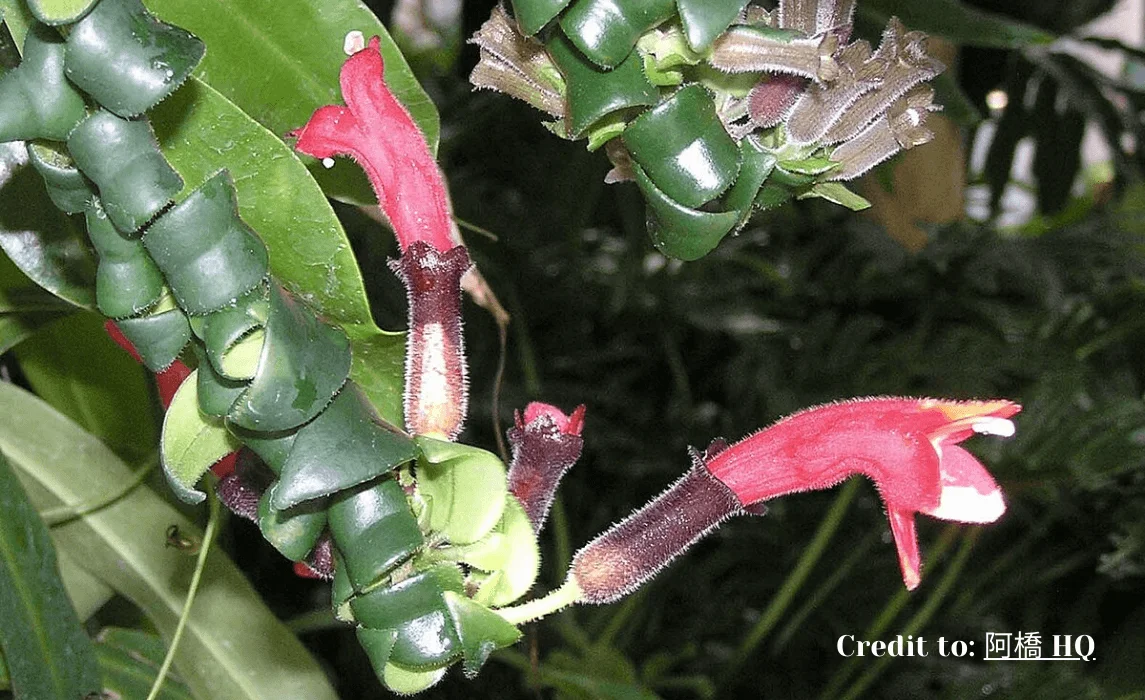
As the name suggests, this variety features uniquely twisted and curled leaves, giving it an eye-catching, textured appearance. The red flowers, similar to the classic lipstick plant, emerge from its cascading stems, adding a bold pop of color. This variety is particularly popular for its decorative foliage, even when not in bloom.
Aeschynanthus ‘Variegated’
This stunning variety stands out with its green leaves streaked with creamy white or yellow variegation. The contrast of the variegated foliage against the signature red blooms makes it a visually striking plant. It requires bright, indirect light to maintain its variegation and thrives in well-draining soil.
A dramatic variety featuring tightly spiraled, curling foliage that adds a sculptural element to any indoor space. The deep green leaves twist and curve along the trailing stems, creating a dynamic look. The plant also produces vibrant red flowers, which contrast beautifully against the twisted leaves.
Choose a 4-6 inch stem from a mature, healthy plant. Look for a stem that is green, firm, and free from pests or diseases.
Use clean, sharp scissors or pruning shears to make a clean cut just below a leaf node (the point where a leaf attaches to the stem).
Remove Lower Leaves:
Strip off the bottom 2-3 leaves, leaving at least 2-3 leaves at the top of the cutting. This prevents the leaves from rotting in the soil and allows the plant to focus its energy on root development.
Dip in Rooting Hormone (Optional):
Rooting hormone is a powder, gel, or liquid that encourages faster root growth. Dip the cut end of the stem into the rooting hormone, tapping off any excess. This step is optional but highly recommended for better success rates.
Plant in a Potting Mix:
Use a well-draining potting mix, such as a blend of peat moss, perlite, and vermiculite, or a cactus/succulent mix. These mixes prevent waterlogging, which can cause the cutting to rot.
Fill a small pot (4-6 inches in diameter) with the potting mix and make a hole in the center using a pencil or your finger. Insert the cutting into the hole, ensuring the bottom 1-2 inches of the stem are buried. Gently press the soil around the stem to secure it.
Provide Humidity:
Cover the pot with a clear plastic bag or plastic wrap to create a mini greenhouse effect. This helps retain moisture and humidity, which is essential for root development.
If using a plastic bag, place it over the pot and secure it with a rubber band or string. If using plastic wrap, drape it loosely over the pot and secure it with tape or a rubber band. Ensure the plastic does not touch the leaves, as this can cause condensation to drip and rot the leaves.
Water Lightly:
Water the soil lightly after planting to settle it around the cutting. Keep the soil slightly damp but not waterlogged. Overwatering can cause the cutting to rot.
Check the soil every few days and water only when the top inch feels dry to the touch.
Wait for Root Growth:
Place the pot in a warm, bright location with indirect sunlight. Avoid direct sunlight, as it can overheat the cutting.
In 2-4 weeks, roots should begin to develop. You can gently tug on the cutting to check for resistance, which indicates root growth.
Remove the Plastic Wrap:
Once roots have formed and the cutting shows new growth (usually after 4-6 weeks), you can remove the plastic wrap or bag. Gradually acclimate the plant to lower humidity by opening the bag or wrap for a few hours each day over the course of a week.
Planting from Seed (Less Common)
Obtain Fresh Seeds:
Collect seeds from mature plants or purchase them from a reputable source. Fresh seeds have a higher germination rate.
Prepare a Seed Tray:
Use a seed tray or small pots with drainage holes. Fill the tray with a well-draining potting mix, such as a seed-starting mix or a blend of peat moss and perlite.
Sow the Seeds:
Lightly press the seeds into the soil surface without burying them too deep. Most seeds need light to germinate, so a light covering of soil or simply pressing them into the surface is sufficient.
Space the seeds evenly to avoid overcrowding.
Mist Lightly:
Use a spray bottle to mist the soil lightly, ensuring it is moist but not soggy. Overwatering can cause the seeds to rot.
Provide Warmth and Humidity:
Cover the seed tray with plastic wrap or a clear plastic lid to retain moisture and create a humid environment.
Place the tray in a warm location (around 70-75°F or 21-24°C) with bright, indirect light. A heating mat can help maintain consistent warmth if needed.
Germination Time:
Seeds may take several weeks to sprout, depending on the plant species. Check the tray regularly to ensure the soil remains moist.
Once the seeds germinate and seedlings emerge, remove the plastic wrap to allow air circulation and prevent mold growth.
Transplanting Seedlings:
When the seedlings have developed a few sets of true leaves and are sturdy enough to handle, transplant them into individual pots with well-draining potting mix.
Lipstick Plant Care Requirements
Soil
To support healthy growth, the lipstick plant requires a well-draining, lightweight potting mix that promotes air circulation around its roots. A blend of orchid bark, peat moss, and perlite is ideal, as it provides the perfect balance of moisture retention and aeration. This combination ensures that water does not accumulate at the roots, which helps prevent the risk of root rot. By creating a breathable and nutrient-rich environment, the plant remains healthy, vibrant, and well-nourished.
Water
Maintaining the right watering routine is essential for a thriving lipstick plant. Since excess moisture can lead to root rot, it’s best to wait until the top inch of soil has dried out before watering again. Always use room-temperature water to avoid shocking the roots, as sudden temperature changes can stress the plant. Ensuring proper drainage is also key—water should flow freely from the pot, preventing any stagnation. If you're unsure, it's safer to underwater slightly rather than risk keeping the soil overly damp, which could lead to fungal issues.
Temperature and Humidity
Closely linked to watering, temperature and humidity play a significant role in the lipstick plant’s overall health. As a tropical plant, it thrives in warm conditions, with an ideal temperature range between 65-80°F (18-27°C). It also prefers moderate to high humidity levels, ideally around 50-70%. If the surrounding air is too dry, the plant may struggle, showing signs of stress such as curling leaves or slowed growth. To maintain the right humidity, consider occasional misting, placing a humidity tray nearby, or using a humidifier. Additionally, keeping the plant away from cold drafts, air conditioning vents, or areas with sudden temperature fluctuations will help prevent stress and ensure steady growth.
Sunlight and Location
Just as temperature and humidity contribute to a healthy plant, proper lighting is equally important. The lipstick plant flourishes in bright, indirect light, making it an excellent choice for spaces near east or north-facing windows. However, exposure to direct sunlight should be minimized, as intense rays can scorch the leaves, causing brown spots and potential damage. If natural light is limited, a grow light can be a great alternative to supplement its needs, ensuring continuous, lush growth and encouraging the plant to produce its signature vibrant blooms.
Maintenance Tips for Lipstick Plant
Fertilizing
To keep your lipstick plant lush and blooming, regular feeding is essential. During its active growing season in spring and summer, apply a balanced liquid fertilizer with equal parts nitrogen, phosphorus, and potassium (such as a 10-10-10 or 20-20-20 formula) every two to three weeks. This provides the necessary nutrients for strong foliage and vibrant flowers. However, excessive feeding can cause the plant to produce more leaves at the expense of blooms, so it’s best to dilute the fertilizer to half strength. As the plant enters its dormant phase in fall and winter, its growth naturally slows, meaning it requires fewer nutrients. To prevent over-fertilization, reduce feeding to once a month or stop entirely until spring arrives.
Pruning
Pruning plays a crucial role in maintaining the lipstick plant’s shape and encouraging healthy growth. Over time, vines can become long and leggy, making the plant look sparse. Regularly trimming back these vines promotes fuller, more compact foliage, resulting in a bushier and more attractive plant. When pruning, use sterilized scissors or shears and cut just above a leaf node, where new growth will emerge. In addition to shaping the plant, removing spent flowers and yellowing leaves helps direct energy toward producing new blooms. This not only keeps the plant looking vibrant but also improves air circulation, reducing the risk of pests and fungal infections. A little pruning every few weeks can make a big difference in keeping your lipstick plant thriving.
Mulching
Although mulching is not necessary for indoor lipstick plants, it can be highly beneficial for those grown outdoors. A light layer of organic mulch, such as shredded bark, coconut coir, or compost, helps retain soil moisture, reducing the need for frequent watering. In addition to keeping the roots hydrated, mulch also regulates soil temperature by keeping it cool in summer and insulated during cooler months. However, it’s important to apply mulch carefully—placing it too close to the plant’s stems can trap excess moisture and lead to root rot. If your lipstick plant is potted outside, a thin layer of mulch can also help prevent rapid evaporation, ensuring the soil remains evenly moist.
Potting and Repotting
Like many houseplants, lipstick plants prefer a slightly snug pot, but they should still be repotted every two to three years to ensure healthy root growth. A clear sign that your plant needs repotting is when roots start growing out of the drainage holes or the soil dries out too quickly after watering. When selecting a new pot, choose one that is only slightly larger than the current one and has adequate drainage holes to prevent water buildup. Use a well-draining potting mix—one that includes peat moss, perlite, and orchid bark—to provide the perfect balance of moisture retention and aeration. Before repotting, gently loosen the roots to encourage them to spread into the fresh soil. If the plant is still growing well in its current container, you can simply refresh the top layer of soil to replenish nutrients without disturbing the roots.
Overwintering
As temperatures drop, lipstick plants require some adjustments to their care routine to stay healthy through the winter months. Since they are tropical plants, they are sensitive to cold drafts and sudden temperature changes, which can lead to leaf drop or stunted growth. To keep them comfortable, place them in a warm, stable environment away from drafty windows, air vents, and doors. Because plant growth slows during winter, watering should also be reduced—allow the top inch of soil to dry out before watering again, but never let the soil become completely dry. The plant thrives in temperatures above 60°F (15°C), so if your home tends to be cool, consider using a heating mat or relocating the plant to a warmer spot. Additionally, indoor heating can lower humidity levels, which may cause the leaves to dry out. To maintain proper humidity, mist the leaves occasionally or place a small tray of water and pebbles nearby.
Aphids cluster on new growth, sucking sap and causing curled leaves. They excrete sticky honeydew, leading to sooty mold. Spray with water, apply insecticidal soap, or use neem oil to control them.
Mealybugs
These white, cotton-like pests hide in leaf nodes, causing yellowing and stunted growth. Remove manually with alcohol-soaked cotton swabs or use neem oil for larger infestations.
Spider Mites
Tiny mites create fine webbing and yellow speckling on leaves. They thrive in dry conditions, so increase humidity and rinse leaves with water. Use insecticidal soap if needed.
Scale Insects
Small, brown or waxy pests attach to stems and suck plant sap, leading to yellowing leaves. Remove them manually with alcohol or use horticultural oil.
Fungus Gnats
These small flies lay eggs in overly moist soil, leading to root damage. Let soil dry between waterings, use sticky traps, or apply Bacillus thuringiensis (Bt) to kill larvae.
Overwatering causes roots to rot, leading to wilting and yellowing leaves. Trim affected roots and repot in well-draining soil. Water only when the top inch of soil is dry.
Botrytis (Gray Mold)
A gray, fuzzy mold appears on leaves and flowers in humid conditions. Improve airflow, remove affected areas, and use a fungicide if necessary.
Powdery Mildew
A white, powdery coating forms on leaves due to high humidity. Improve ventilation and apply a baking soda solution or sulfur-based fungicide.
Leaf Spot Disease
Dark spots with yellow halos develop on leaves due to bacteria or fungi. Remove infected leaves, avoid overhead watering, and apply a copper-based fungicide.
Frequently Asked Questions:
1. Why is my lipstick plant not blooming?
Plants don’t usually bloom if they don’t get enough light, nutrients, or proper care. Ensuring bright light and using a diluted fertilizer will encourage flowering.
2. Why should I add a lipstick plant to my indoor plant collection?
A lipstick plant is generally considered a great addition to an indoor plant collection because of its trailing vines, easy care requirements, and stunning lipstick flowers.
3. How do I make my lipstick plant bushier?
Regular pruning keeps your plant looking full and compact. Trim long, leggy stems to encourage bushier growth.
Related posts
Here are some articles you might be interested in.



.webp)
.webp)