Anjali was born and raised in Indi and is now residing in New Jersey with her husband. Anjali's passion lies in raising her own vegetables and herbs, which she wants to share with others.
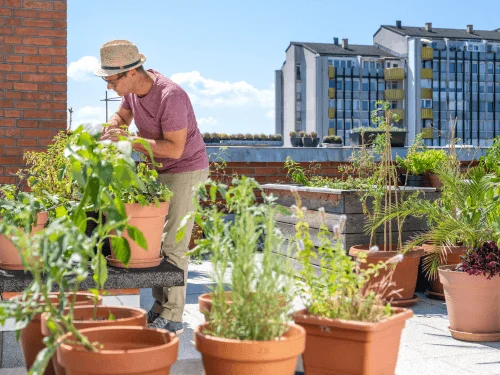
Rooftop Garden Design And Roof Garden Ideas For Your Terrace
What is the most important step before transforming your rooftop into a garden?
The most critical step is hiring a structural engineer to assess the load-bearing capacity of your roof surface. Soil, water, and containers are incredibly heavy, and ignoring weight restrictions can lead to catastrophic structural damage. Additionally, you must verify all local laws to ensure compliance.
How do I manage regular watering during hot weather and dry spells?
Because the sun and wind dry out elevated pots rapidly, hand-watering becomes exhausting. The best solution is to install a drip irrigation system with automated irrigation lines to ensure consistent moisture. Using a self-watering pot or adding vermiculite and coir to your soil mix will also help retain water during a dry spell.
What kind of soil mix should I use for growing plants in containers on a roof terrace?
Never use standard garden dirt, as it is too heavy and compacts easily. Instead, use a lightweight potting soil that includes a balanced mix of loam for structure, coir for moisture retention, and vermiculite for aeration. Enrich this base with organic compost and worm castings to provide nutrients.
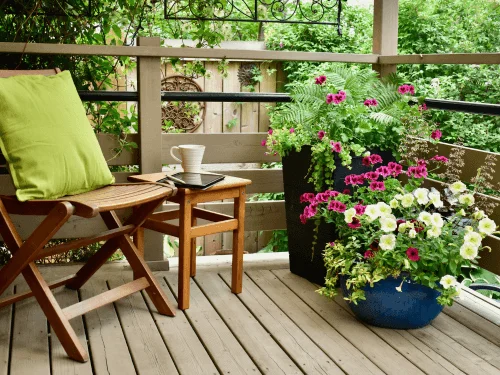
Balcony Gardening Q&A
Q: Do I need a lot of direct sunlight per day to start a balcony garden?
A: No. While cherry tomatoes need 6-8 hours of direct sunlight per day, leafy greens and herbs like parsley or chive thrive in partial shade. Simply choose the right plants for your specific amount of sun.
Q: Can I use standard garden soil in my balcony pots?
A: No. Standard garden soil is too heavy and compacts easily. Always use a high-quality, well-draining potting soil mixed with peat moss and compost for your container garden.
Q: How often should I be watering my plants on a balcony or rooftop?
A: Check daily. Stick your finger an inch into the soil; if it is dry, it is time to water. Container plants dry out quickly, so ensure pots have holes in the bottom and consider self-watering pots for convenience.
Outdoor Foliage Plants Q&A
Q: Why are my shade-loving plants losing their variegated leaves?
A: If a plant with unique foliage or variegated leaves (like a Hosta) is planted in deep, absolute shade, it may revert to producing solid dark green leaves to maximize its chlorophyll production. Moving it to an area with light shade or dappled morning light often restores the vibrant array of color.
Q: What does it mean when a plant is "drought tolerant"?
A: Drought tolerant plants, like Dusty Miller with its thick silver foliage, have adapted to survive long periods with very little water. However, "tolerant" does not mean "immune." They still grow best with occasional deep watering, especially when planted in containers that tend to dry out rapidly.
Q: Can I mix these outdoor foliage plants into my existing herb garden?
A: Absolutely! Many gardeners slip a colorful container of Coleus or Sweet Potato Vine right next to their raised beds or herb garden to add a splash of non-edible color to the functional space. Just ensure the light requirements match the surrounding plants.
Having grown up in India, ginger holds a special place in my heart (and my kitchen!). From spicing up curries to brewing soothing teas, its versatility knows no bounds. So, when I moved to New Jersey, I brought a piece of home with me by starting my own indoor ginger garden. If you'd like to learn how to do plant this root crop indoors, you're in the right place.
Understanding Ginger
Alright, so let's talk ginger. There are a few different types floating around, but the ones you'll likely come across are culinary ginger and ornamental ginger.
Culinary ginger is the one you'll find in your spice rack or at the grocery store. It's got that signature spicy kick and is a staple ingredient in dishes from all over the world, especially in Asian cooking.
Then there's ornamental ginger. This one's all about looks. It's grown for its beautiful flowers and foliage, making it a real head-turner in the garden. But here's the catch—it's strictly for show, not for munching on.
Benefits of Indoor Cultivation
Growing ginger at home offers a bunch of perks that are hard to resist. For starters, you’ll have easy access to it, no matter the season. Plus, ginger doubles as a natural air purifier, making your indoor space not just greener but fresher too. And let's not forget how low-key ginger plants are—they're the definition of low-maintenance, asking for little but giving a lot in return.
Bringing ginger indoors also puts you in the driver's seat when it comes to its growing environment. You call the shots on how much light, water, and TLC your ginger plant gets, which means you're set up for success from the get-go.
So, whether you're looking to spice up your cooking or simply want to add a touch of green to your space, growing ginger is a no-brainer. It's easy, it's rewarding, and it's bound to add a little extra zest to your indoor oasis.
Planting Process
Choosing the Right Rhizome
To grow your own ginger, start with fresh, plump, and firm ginger rhizomes from your local nursery or grocery store. Look for one that is plump and firm with several eye buds. The eye buds are small points on the rhizome that will eventually sprout into shoots. Make sure that it's healthy and free from any soft or mushy spots.
Required Materials
To grow gingers, you'll need the following materials:
A large pot with drainage holes
High-quality potting soil
Ginger rhizome
Water
Fertilizer (optional)
Prepare Your Rhizomes
Next, you need to soak the rhizomes in lukewarm water overnight to help them sprout faster.
Soil and Container Preparation
While waiting for the soaked rhizomes, start preparing your soil and container.
Choose a spacious pot with good drainage to accommodate your growing ginger roots. Then, opt for a well-draining potting mix that's rich in organic matter, such as a blend of potting soil and compost. You can also add perlite or sand to the soil to improve drainage.
Fill your chosen pot or container with potting mix, leaving 1-2 inches of space at the top.
Plant Your Rhizomes
Once the soil is prepared, it's time to plant the ginger rhizomes.
Start by placing your soaked ginger rhizomes horizontally on top of the potting mix, with the buds facing upwards. Cover them with a thin layer of soil, ensuring they're snug but not buried too deep. I recommend you gently press down on the soil to ensure good contact with the rhizomes.
Water Thoroughly
Give your newly planted rhizomes a good drink of water, ensuring the soil is evenly moist but not waterlogged.
Find the Perfect Spot
Finally, place your ginger plant in a warm, sunny spot with indirect sunlight, such as a windowsill or patio. Ginger loves warmth and humidity, so keep it away from cold drafts and dry air.
Maintenance
Now that your ginger plant is happily nestled in its new home, it's time to show it some love with regular maintenance. Here's what you'll need to do:
Watering Schedule
It's important that you keep the soil consistently moist but avoid overwatering as it can lead to root rot, so be sure to let the soil dry out a bit between watering.
What I do is I water my ginger plant once a week, but the frequency may vary depending on the humidity level and temperature of your home. Here's a tip: give the top inch of soil a little poke. If it feels dry to the touch, that's your cue to break out the watering can.
Sunlight and Temperature Requirements
To keep your ginger plant in tip-top shape, make sure it gets plenty of bright, indirect sunlight. I like to park mine by a window that gets some morning rays but stays shady in the afternoon. And when it comes to temperature, aim for that sweet spot between 68°F and 77°F (20°C to 25°C). Just steer clear of any chilly drafts or hot blasts from heating vents—they can stress out your ginger.
Fertilizing Guidelines
To promote healthy growth, I fertilize my ginger plant once a month with a balanced fertilizer. You can also use a slow-release fertilizer for convenience. Be sure to follow the instructions on the fertilizer packaging and avoid over-fertilizing, as this can cause damage to the plant. It's also important to flush the soil with water every few months to prevent salt buildup from the fertilizer.
Pruning
Keep your ginger plant spick and span by snipping away any yellowed or wilted leaves as necessary. This not only keeps things looking neat but also promotes overall plant health.
And here's a fun fact: as your ginger plant grows, it might start sending out new shoots or "pups." You can gently scoop these pups away from the main plant and replant them to start a whole new generation of ginger plants.
Harvesting and Storage
Ah, the moment you've been waiting for—harvest time! Here's how to know when your ginger is ready to harvest:
Wait for Signs of Growth
Ginger typically takes 8-10 months to reach maturity, so be patient and wait for signs of growth, such as lush green foliage and healthy-looking rhizomes.
Check for Readiness
When your ginger plant is mature, you'll notice the rhizomes pushing up through the soil surface. Carefully dig around the base of the plant to check the size and color of the rhizomes.
Harvesting
When the ginger plant is mature, the leaves will start to turn yellow and dry out. This is a sign that the plant is ready to be harvested.
To harvest, gently loosen the soil around the base of the plant and carefully lift the entire rhizomes out of the ground. Trim off any excess roots and foliage, leaving a few inches of stem attached to each rhizome.
Storing
Once you have harvested your ginger, you will want to store it properly to ensure it stays fresh and flavorful.
First, remove any excess dirt from the ginger rhizome and gently wash it in cool water. Then, allow it to dry completely.
Next, wrap the ginger in a paper towel and place it in a plastic bag. Make sure to remove as much air as possible from the bag before sealing it.
Finally, store the ginger in the refrigerator. It should keep for several weeks.
Alternatively, you can freeze ginger for longer-term storage. Simply peel and chop the ginger into small pieces, then place them in a freezer bag. When you're ready to use the ginger, simply remove the amount you need and return the rest to the freezer.
Avoid These Mistakes
Overwatering
Too much water can lead to root rot and other fungal diseases, so be sure to water your ginger plant sparingly and allow the soil to dry out between waterings.
Insufficient Light
Ginger plants thrive in bright, indirect sunlight, so be sure to place yours in a sunny spot where it can soak up plenty of rays. Without enough light, your ginger plant may become leggy and weak.
Poor Drainage
Good drainage is essential for healthy ginger plants, so be sure to choose a pot or container with plenty of drainage holes to prevent waterlogging.
Crowded Container
Avoid planting multiple ginger rhizomes too close together in the same pot, as this can lead to overcrowding and competition for nutrients. Give each rhizome lots of room to spread out and grow.
Ignoring Pests
Keep a close eye on your ginger plant for signs of pests or disease and take prompt action to address any issues before they get out of hand.
FAQs
Q: Do I need a lot of space to grow ginger indoors?
A: Not necessarily. Ginger plants can be grown in pots or containers, making them suitable for small indoor spaces like apartments or condos.
Q: Do I need to repot my indoor ginger plant as it grows?
A: Yes, you may need to repot your indoor ginger plant every year or two as it outgrows its container. Choose a slightly larger pot each time to accommodate the growing roots.
Q: Can I use ginger leaves or stems for cooking?
A: While ginger leaves and stems are edible, they are not commonly used in cooking. Instead, focus on harvesting the rhizomes for their aromatic flavor and medicinal properties.