How to Grow Freesia: A Beginner's Guide to Fragrant Blooms
Published on
February 28, 2025
Author
Sarah Wilson
Sarah Wilson started her gardening journey during the pandemic and had fallen in love with it ever since. Eager to connect with fellow garden enthusiasts, she wants to share the knowledge she's gained over the past three years.
Backyard Garden Ideas Q&A
What is the easiest backyard garden for beginners?
Container gardening and raised bed vegetable gardens are the easiest for beginners. Containers allow you to control the soil and move plants to find the best light, while raised beds prevent weeds and soil compaction, making maintenance much simpler.
How do I start a backyard garden with no experience?
Start small. Choose a small outdoor space or a few pots on a patio. Pick 3 to 5 easy-to-grow plants (like basil, cherry tomatoes, or marigolds), buy high-quality potting soil, and place them in an area that gets good sunlight. Observe them daily to learn their watering needs.
What vegetables grow best in a backyard garden?
For most backyard spaces, tomatoes, zucchini, radishes, lettuce, and bush beans are excellent, high-yield choices. If you have a very small backyard, opt for vertical growers like climbing peas or pole beans.
How much does it cost to start a backyard garden?
You can start a simple backyard container garden for under $50 by purchasing a few pots, soil, and seeds. Building raised beds or implementing full backyard landscaping ideas on a budget might cost between $150 to $500, depending on the materials used (like reclaimed wood vs. cedar).
Do backyard gardens need full sun?
Not necessarily! While vegetable gardens and drought-tolerant Mediterranean setups require full sun (6+ hours), you can easily create a beautiful shade garden using ferns, hostas, and astilbes in low-light outdoor areas.
How often should I water backyard plants?
This depends heavily on your garden type and climate. Container gardens and raised beds may need daily watering during peak summer heat. In-ground drought-tolerant shrubs might only need watering once every few weeks. A general rule is to water deeply when the top 1-2 inches of soil feel dry.
Can I grow a garden in a small backyard?
Absolutely. Small backyard ideas like vertical gardens, hanging baskets, and compact container gardening allow you to transform even the tiniest balcony or narrow side yard into a lush outdoor oasis.
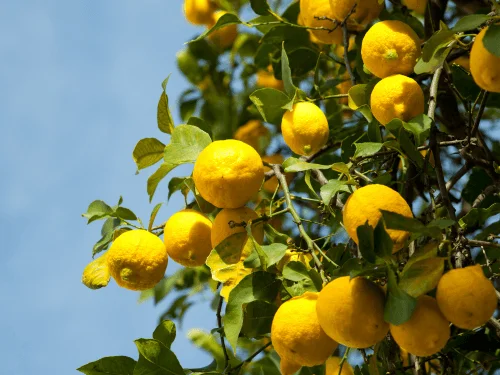
How to Grow a Lemon Tree FAQ
Do I need two lemon trees to produce fruit?
No, you do not. Lemons are self-pollinating, which means the flowers contain both the male and female parts necessary to produce fruit. A single little lemon tree can yield an abundant harvest all on its own.
How do I pollinate my indoor lemon tree?
While lemons are self-pollinating, they normally rely on wind and bees to move the pollen around the blossom. Because you are growing indoors, you must act as the bee. When the tree is in full bloom, take a small, soft paintbrush or a cotton swab and gently brush the inside of each flower, moving from blossom to blossom. This simple act will successfully pollinate the flowers, ensuring they turn into fruit.
Why is my Meyer lemon tree not blooming?
A Meyer lemon tree typically fails to bloom due to a lack of light or insufficient fertilizer. Ensure your tree is getting a full 8 to 12 hours of direct sunlight. Also, double-check your feeding schedule; a lack of phosphorus can inhibit blooming. Finally, ensure the tree isn't too cold, as cool temperatures can delay or prevent the bloom cycle entirely.
English Garden Q&A
How can I implement English garden ideas if I only have a very small space or a compact front garden?
Focus heavily on vertical layering using climbing roses or honeysuckle, and use a soft pastel color palette to add an illusion of depth. Gathering multi-sized planters along walkways also provides an overflowing, lush look within a restricted footprint.
What are the best strategies to ensure my English border retains visual interest during the winter months?
Incorporate structural evergreens like boxwood hedges, pruned topiary, or permanent hardscape anchors like a stone sundial. Avoid clear-cutting in autumn; leaving dried seed heads and tall foxglove stalks intact through winter captures striking structural shapes and textures.
Can I achieve an authentic cottage style look if my yard does not receive direct sun all day?
Yes. While roses need direct sun, classic woodland edge plants like the foxglove thrive beautifully in partial shade and dappled light. Pair these with shade-tolerant foliage and soft ground cover to capture a romantic, layered look.
Want to learn how to grow some of the most fragrant flowers in the world? Freesia, with its vibrant colors and intoxicating scent, is a favorite among gardeners and flower enthusiasts alike. While these stunning blooms might seem delicate, they're surprisingly easy to cultivate, even for those who are new to gardening.
I’ll walk you through everything you need to know, from choosing the right varieties to planting, watering, and caring for your freesia. I’ll even share tips on how to harvest and enjoy these fragrant blooms indoors. Whether you're an experienced gardener or just starting out, growing freesia is a rewarding experience that will add beauty and fragrance to your life. So, let's get started on this fragrant journey together!
Plant Attribute
Details
Plant Name
Freesia (Leichtlinii, Refracta or spp.)
Plant Type
Corm (a type of bulb)
Size
12-18 inches tall, 6-12 inches wide
Soil Type
Well-draining, sandy or loamy
Soil pH
Slightly acidic to neutral (6.0-7.0)
Bloom Time
Spring (mainly), some varieties bloom in summer
Hardiness Zones
9-11 (USDA)
Native Area
South Africa
Toxicity Level
Mildly toxic to pets if ingested
When and Where to Plant Freesia
Timing
Warm Climates (USDA Zones 9-10): If you live in a warmer climate, the best time to plant freesia corms (the bulb-like structures) is in the fall. This allows them to establish roots during the mild winter and produce flowers in the spring.
Cooler Climates (USDA Zones 4-8): Gardeners in cooler regions should wait until spring to plant freesia corms, after the threat of frost has passed. This timing will ensure that the corms don't freeze over the winter.
Location
Sunlight: Freesias love sunshine! They need at least 6-8 hours of direct sunlight each day. Choose a spot in your garden that receives plenty of sun, especially in the morning.
Soil: Well-draining soil is crucial. Freesias don't like soggy roots, as this can lead to rot. If your soil is heavy clay, amend it with compost or other organic matter to improve drainage.
Protection: In areas with strong winds, freesias may need a little protection. Plant them near a wall, fence, or other plants to help shield them from harsh gusts.
How to Plant Freesia (Step-by-Step)
Prepare the bulbs:
Soaking (Optional): Some gardeners like to soak their freesia corms in lukewarm water for a few hours before planting. This can help jumpstart the growth process, but it's not strictly necessary.
Inspection: Before planting, look over your corms. Discard any that are soft, mushy, or show signs of mold.
Prepare the soil:
Location: Choose a sunny spot with well-draining soil (as discussed earlier).
Digging: Use a garden fork or shovel to loosen the soil to a depth of about 8-10 inches. This helps the roots spread easily.
Amending: If your soil is heavy or doesn't drain well, mix in some compost or other organic matter to improve its texture and drainage.
Planting depth and spacing:
Depth: Dig a hole about 2 inches deep.
Placement: Gently place a freesia corm in the hole with the pointy end facing upwards.
Spacing: Leave about 3-4 inches of space between each corm. This gives them room to grow and develop.
Covering: Carefully cover the corms with soil and pat it down gently.
Freesia Care Requirements
Watering:
Regularity: Freesias prefer consistent moisture, especially during their growing season (spring and summer). Water them deeply but infrequently, allowing the top inch of soil to dry out slightly between waterings. Avoid overwatering, as this can lead to bulb rot.
Reduced Watering: As the weather cools and the foliage starts to die back, reduce watering. During their dormant period (usually winter), freesias need very little water.
Temperature and humidity:
Ideal Temperature: Freesias thrive in cool to moderate temperatures, ideally between 60-70°F (15-21°C) during the day and slightly cooler at night.
Frost Sensitivity: Freesias are frost-tender, meaning they cannot tolerate freezing temperatures. If you live in a colder climate, you may need to bring them indoors or provide protection during the winter.
Humidity:
Freesias prefer moderate humidity levels. If the air is too dry, you can mist them occasionally or place them near a pebble tray filled with water.
Fertilizer:
Type: Use a balanced, water-soluble fertilizer formulated for flowering plants.
Frequency: Feed your freesias every 2-3 weeks during their growing season, starting when the foliage emerges. Stop fertilizing when the flowers begin to fade.
Lighting:
Sunlight: Freesias love sunshine! They need at least 6-8 hours of direct sunlight each day for optimal growth and blooming. Choose a sunny spot in your garden or place potted freesias in a bright window.
Maintenance Tips
Staking:
Why Stake?: As freesias grow taller, especially varieties with larger flowers, their stems may become top-heavy and need support to prevent them from flopping over.
When to Stake: Start staking when the plants reach about 6-8 inches tall.
How to Stake: Gently tie the stems to stakes using soft garden twine or fabric strips. Be careful not to tie them too tightly, as this can damage the stems. You can also use grow-through supports or plant them near other sturdy plants for natural support.
Mulching:
Benefits: Adding a layer of mulch (such as shredded bark, straw, or compost) around your freesias helps retain soil moisture, suppress weeds, and regulate soil temperature.
When to Mulch: Apply mulch in the spring after the soil has warmed up.
How to Mulch: Spread a 2-3 inch layer of mulch around the plants, keeping it a few inches away from the stems to prevent rot.
Potting and Repotting:
Potting: If you're growing freesias in containers, choose pots with drainage holes to prevent waterlogging. Use a well-draining potting mix.
Repotting: Freesias don't need frequent repotting. If they become overcrowded, you can divide the corms and repot them in the fall after the foliage has died back.
Overwintering:
Warm Climates: In warmer regions (USDA zones 9-10), freesias can often be left in the ground over winter. Simply cut back the foliage after it yellows.
Cold Climates: In colder areas (USDA zones 4-8), you have two options:
Digging Up: After the first frost kills the foliage, carefully dig up the corms, let them dry, and store them in a cool, dry place until spring.
Mulching: You can try mulching heavily to protect the corms from freezing temperatures, but this is not always successful.
Common Pests and Diseases
Pests
Aphids
Signs: Clusters of tiny green, black, or brown insects on leaves and stems, wilting or yellowing leaves, sticky honeydew.
Troubleshooting: Spray with water, insecticidal soap, or neem oil. Introduce beneficial insects like ladybugs or lacewings.
Prevention: Avoid over-fertilizing, as lush growth attracts aphids.
Thrips
Signs: Silver or brown streaks on leaves and petals, deformed flowers.
Troubleshooting: Use sticky traps, insecticidal soap, or neem oil.
Prevention: Keep the area around your freesias clean and free of debris.
Spider Mites
Signs: Tiny yellow or brown spots on leaves, fine webbing.
Troubleshooting: Increase humidity by misting or using a pebble tray. Use insecticidal soap or horticultural oil.
Prevention: Avoid dusty conditions, as spider mites thrive in dry environments.
Diseases
Fusarium Corm Rot
Signs: Rotting, mushy corms, yellowing and wilting leaves.
Troubleshooting: Unfortunately, there is no cure. Remove and destroy infected plants.
Prevention: Plant disease-free corms in well-draining soil. Avoid overwatering.
Gray Mold (Botrytis Blight)
Signs: Fuzzy gray mold on leaves, stems, and flowers.
Troubleshooting: Remove and destroy infected plant parts. Apply a fungicide if necessary.
Prevention: Provide good air circulation, avoid overhead watering, and space plants properly.
Freesia Mosaic Virus
Signs: Mottled or streaked patterns on leaves, stunted growth.
Troubleshooting: No cure exists. Remove and destroy infected plants.
Prevention: Control pests that can spread the virus, such as aphids and thrips. Choose certified disease-free plants.
Harvesting Freesia Flowers
When to cut
Ideal Stage: The best time to cut freesias is when the first flower on the stem is fully open, and the buds above it are showing color. This ensures a longer vase life, as the remaining buds will continue to open indoors.
Avoid Fully Opened Blooms: Don't wait until all the flowers on the stem are fully open, as they will fade faster once cut.
How to cut
Tools: Use a sharp, clean pair of garden shears or scissors. Clean tools prevent the spread of diseases.
Cutting Technique: Cut the stem at a 45-degree angle. This increases the surface area for water uptake and helps prevent the stem from sitting flat on the bottom of the vase.
Stem Length: Leave at least 6-8 inches of stem attached to the flowers. This provides a good base for arranging and allows for recutting later if needed.
Make them last longer
Water and Flower Food: Immediately place the cut stems in a clean vase filled with fresh, cool water. Add a floral preservative (flower food). This nourishes the flowers, inhibits bacterial growth, and helps them last longer.
Location: Keep the vase in a cool, draft-free location, away from direct sunlight and heat sources. Avoid placing them near ripening fruits, which release ethylene gas that can shorten the life of flowers.
Recutting Stems: Every few days, recut the stems at a 45-degree angle under running water. This removes any blockages and allows for better uptake.
Changing Water: Change the water in the vase every other day or when it becomes cloudy. This helps prevent bacterial growth and keeps the flowers fresh.
FAQs: Frequently Asked Questions
Q: When should I plant freesia bulbs for optimal growth?
The best time to plant freesia bulbs, also known as corms, depends on your climate. In USDA Hardiness Zone 9, plant the corms in fall for spring flowering. If you're planting outdoors in cooler zones, plant them in spring after the last frost for late summer flowers. Another option is to plant freesia bulbs in indoor pots for early summer flowering.
Q: Can I grow freesia bulbs indoors?
A: Yes, you can grow freesias in indoor pots for early summer flowering. Plant the bulbs from January to March, making sure they are about 2 inches deep with the pointed end facing up. Keep the soil moist but not soggy, and place the pots in a sunny location.
Q: What are the basic care requirements for freesia plants?
A: Freesia plants grow best in cool, sunny locations with well-draining soil. Avoid overwatering. Fertilize them every few weeks with a balanced fertilizer. Freesias may be grown outdoors in full sun or partial shade.
Q: How can I make freesia flowers last longer after cutting?
A: To make freesia flowers last longer, cut the stem at an angle when the bottom flower is open. Place the stems in a clean vase with fresh water and flower food. Keep the vase in a cool location away from direct sunlight and drafts. Recut the stems every few days.
Q: Do I need to dig up freesia corms for winter storage?
A: Freesias are tender perennials and may not survive the winter outdoors in colder climates. In USDA Hardiness Zones 9 and above, they can typically stay in the ground. However, in colder zones, you can dig up the corms after the foliage dies back in the fall, store them indoors for winter, and replant them in spring.